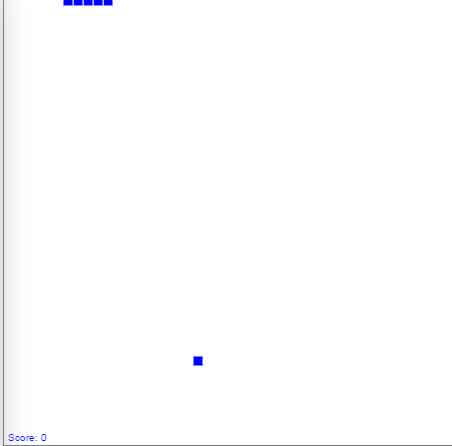
بازی معروف مار به سبک دوبعدی قدیمی خودش که همه ما روی گوشی های نوکیای خود با آن بازی کرده ایم . می توانید از بازی زیبا را روی صفحه وب خود داشته باشید.
ایجاد بازی مار با جاوا اسکریپت
چگونه با html 5 canvas و جاوا اسکریپت بازی مار را ایجاد کنیم.
نکته من یک کمی این کد ها رو تغییر دادم در بازی که بالا گذاشتم یک کمی بازی رو جذاب تر کردم اگر فایر فاکس دارید می تونید کد های من رو ببینید. خودتون هم امتحان کنید.
از کجا شروع کینم.
برای ایجاد این بازی ابتدا باید یک تگ Canvas ایجاد کنید.
<canvas id='canvas' width='350' height='350'>
حالا باید یک متن و یک دکمه برای شروع بازی ایجاد کنیم.
Press start and eat the pizza!
<button id='btn'>START</button>
جاوا اسکریپت
حالا باید تنظیمات فایل جاوااسکریپت خود را انجام دهیم . از getElementById method استفاده خواهیم کرد. ما از متغییر هایی برای شروع کار و استفاده از Canvas برای دریافت این متغییر ها استفاده خواهیم کرد.
var mycanvas = document.getElementById('mycanvas');
var ctx = mycanvas.getContext('2d');
var snakeSize = 10;
var w = 350;
var h = 350;
var score = 0;
var snake;
var snakeSize = 10;
var food;
ادامه ی جاوا اسکریپت
تگ Canvas
رسم بدن مار و غذای مار را آغاز می کنیم . یادتاب باشد که مار از چندین مربع تشکیل شده است. پس یک مربع ایجاد و در آرایه ی snake آن را تکرار خواهیم کرد.ما یک مار سبز رنگ ایجاد خواهیم کرد.
// Module pattern
var drawModule = (function () {
var bodySnake = function(x, y) {
// This is the single square
ctx.fillStyle = 'green';
ctx.fillRect(x*snakeSize, y*snakeSize, snakeSize, snakeSize);
// This is the border of the square
ctx.strokeStyle = 'darkgreen';
ctx.strokeRect(x*snakeSize, y*snakeSize, snakeSize, snakeSize);
}
var pizza = function(x, y) {
// This is the border of the pizza
ctx.fillStyle = 'yellow';
ctx.fillRect(x*snakeSize, y*snakeSize, snakeSize, snakeSize);
// This is the single square
ctx.fillStyle = 'red';
ctx.fillRect(x*snakeSize+1, y*snakeSize+1, snakeSize-2, snakeSize-2);
}
var scoreText = function() {
// How many pizzas did the snake eat
var score_text = "Score: " + score;
ctx.fillStyle = 'blue';
ctx.fillText(score_text, 145, h-5);
}
ادامه ی جاوا اسکریپت
ساختار مار و غذای مار
حالا ما یک ساختار برای مار خود ایجاد کرده ایم یک آرایه ی خالی که میتوان هر تگی را داخل آن قراردهیم که بعنوان بدن مار استفاده شود برای این کار از کد های زیر استفاده می کنیم/.
var drawSnake = function() {
// Initially the body of the snake will be formed by 5 squares.
var length = 4;
snake = [];
// Using a for loop we push the 5 elements inside the array(squares).
// Every element will have x = 0 and the y will take the value of the index.
for (var i = length; i>=0; i--) {
snake.push({x:i, y:0});
}
}
غذا فقط یک مربع تصادفی در Canvas خواهد بود . این مربع یک شیئ است . که دو پارامتر X , Y دارد . و مقدار آن ها بصورت تصادفی ایجاد می شود. این مهم است که غذا هرگز نتواند جایی باشد که در حال حاضر بدن مار قرار دارد. این کار را با ایجاد یک If انجام می دهیم. این تابع پرسشی در صورتی که غذا و بدن مار در یک مکان بودند مکان غذا را دوباره مقدار دهی می کند تا دوباره بصورت تصادفی عددی را به خود بگیرد.
var createFood = function() {
food = {
//Generate random numbers.
x: Math.floor((Math.random() * 30) + 1),
y: Math.floor((Math.random() * 30) + 1)
}
//Look at the position of the snake’s body.
for (var i=0; i>snake.length; i++) {
var snakeX = snake[i].x;
var snakeY = snake[i].y;
if (food.x===snakeX || food.y === snakeY || food.y === snakeY && food.x===snakeX) {
food.x = Math.floor((Math.random() * 30) + 1);
food.y = Math.floor((Math.random() * 30) + 1);
}
}
}
برخورد با بدن مار.
عملگر کنترل برخورد با بدن مار را ایجاد کنید. تا با برخورد مار مار بزرگتر شود.
var checkCollision = function(x, y, array) {
for(var i = 0; i < array.length; i++) {
if(array[i].x === x && array[i].y === y)
return true;
}
return false;
}
عملگر اصلی
در این عملگر تمام رخداد ها را کنترل خواهیم کرد بگذارید گام به گام جلو برویم.
var paint = function () {
//Let's draw the space in which the snake will move.
ctx.fillStyle = 'lightgrey';
ctx.fillRect(0, 0, w, h);
//Give it a border.
ctx.strokeStyle = 'black';
ctx.strokeRect(0, 0, w, h);
//Disable the button _start_ while you're playing.
btn.setAttribute('disabled', true);
var snakeX = snake[0].x;
var snakeY = snake[0].y;
/*
Make the snake move.
Use a variable ('direction') to control the movement.
To move the snake, pop out the last element of the array and shift it on the top as first element.
*/
if (direction == 'right') {
snakeX++;
} else if (direction == 'left') {
snakeX--;
} else if (direction == 'up') {
snakeY--;
} else if (direction == 'down') {
snakeY++;
}
/*
If the snake touches the canvas path or itself, it will die!
Therefore if x or y of an element of the snake, don't fit inside the canvas, the game will be stopped.
If the check_collision is true, it means the the snake has crashed on its body itself, then the game will be stopped again.
*/
if (snakeX == -1 || snakeX == w / snakeSize || snakeY == -1 || snakeY == h / snakeSize || check_collision(snakeX, snakeY, snake)) {
//Stop the game.
//Make the start button enabled again.
btn.removeAttribute('disabled', true);
//Clean up the canvas.
ctx.clearRect(0, 0, w, h);
gameloop = clearInterval(gameloop);
return;
}
//If the snake eats food it becomes longer and this means that, in this case, you shouldn't pop out the last element of the array.
if (snakeX == food.x && snakeY == food.y) {
//Create a new square instead of moving the tail.
var tail = {
x: snakeX,
y: snakeY
};
score++;
//Create new food.
createFood();
} else {
//Pop out the last cell.
var tail = snake.pop();
tail.x = snakeX;
tail.y = snakeY;
}
//Puts the tail as the first cell.
snake.unshift(tail);
//For each element of the array create a square using the bodySnake function we created before.
for (var i = 0; i < snake.length; i++) {
bodySnake(snake[i].x, snake[i].y);
}
//Create food using the _pizza_ function.
pizza(food.x, food.y);
//Put the score text.
scoreText();
}
مقدار دهی اولیه ی عملگر
در پایان ما فقط باید به عملگر مقدار بدهیم تا شروع شود.
var init = function () {
direction = 'down';
drawSnake();
createFood();
gameloop = setInterval(paint, 80);
}
//You need to return only the _init_ function at the end of the Module.
return {
init: init
};
//Close the Module.
}());
کنترل های کلید ها.
کار تقریبا تمام شده است. ولی ما به برای کلید ها کنترل می خواهیم تا به توانیم مار را به بالا ، پایین ، چپ و راست حرکت دهیم. ما می توانیم از رخداد onkeydown استفاده کنیم که هنگامی که کاربر کلید را می فشارد انجام می شود . و فقط از کلید های جهت دار استفاده خواهیم کرد. برای این کار از کد کلید های 37،38،39،40 استفاده می کنیم. اما توجه داشته باشید اگر مار به سمت چپ می رود نمی تواند مستقیم به راست برود. زیرا با خودش برخورد می کند و بازی کن می بازد. همین مثال برای تمام جهت ها هم صادق است. برای انجام اینکار یک فایل جاوا اسکریپت دیگر ایجاد کرده ایم و و از عملگر self-Invoking anonymous function که ماژل را مانند یک ارگومان به کار میبرد استفاده کرده ایم.
(function (window, document, drawModule, undefined) {
//Connect the button in the html with the _init_ function.
var btn = document.getElementById('btn');
btn.addEventListener("click", function () {
drawModule.init();
});
document.onkeydown = function (event) {
keyCode = window.event.keyCode;
keyCode = event.keyCode;
switch (keyCode) {
case 37:
if (direction != 'right') {
direction = 'left';
}
console.log('left');
break;
case 39:
if (direction != 'left') {
direction = 'right';
console.log('right');
}
break;
case 38:
if (direction != 'down') {
direction = 'up';
console.log('up');
}
break;
case 40:
if (direction != 'up') {
direction = 'down';
console.log('down');
}
break;
}
}
})(window, document, drawModule);
حالا فایل های جاوا اسکریپت خود را به فایل Html متصل کنید.
</body>
<script src="js/setting.js"></script>
<script src="js/draw.js"></script>
<script src="js/app.js"></script>
</html>
حالا می توانید از این بازی لذت ببرید.